Sunday, May 13, 2007

CSE 7312 Project: Done!

I have a lot of things to do in the coming month with work, school and planning for the marriage so I decided to pound out the rest of this project as soon as possible. After a marathon session over the past week I completed implementation of SysML Ant and even completed the report and the presentation.

SysML Ant performs all of the tasks I set out to implement. It reads in the XML file, identifies the test cases that contain a JUnit test, executes the JUnit tests and updates the file with the results. It is executable from Ant as a task, as a stand alone application or as a library.

The report chronicles the development process including the requirements analysis, design, implementation and test, lessons learned and the future work required to turn it into a production ready tool. With the SysML diagrams, UML class diagram and the source code, the report is over 60 pages in length. However, the actual prose is under 20 pages.

Hurray I'm done. One more project and a final to go.

Saturday, May 05, 2007

CSE7312 Project Progress

I've continued to make progress over this weekend (despite losing several hours cleaning up the blown over tree in my front yard). My goal is to be done with the coding be the end of the day Monday (three days ahead of my original goal).

At the end of Friday I had what I thought a daunting task ahead of me. All I had accomplished was reading in an XML file and turn that into an internal representation. I was worried because the meat of what I needed to do was still left to be done. After today I am much more optimistic. I've completed the real meat of the project which is discovering what requirements have Test Cases, which of those Test Cases have an associated JUnit test and executing the JUnit test. All that is left is to update the XML file and make the tool executable from Ant.

I've also started to gather together a number of to dos that should be addressed before this would become a viable tool for general use.

To Do
  • Implement the internal representation of the SysML in an embedded database such as JavaDB or Derby. This will make the code more flexible and allow more freedom in what objects and relationships are allowed (right now unknown relationships generate an error)
  • Convert it to use true XMI formatted files.
  • Make the tool smart enough to allow more than one Test Case with a JUnit test to be associated with a single requirement.
  • Make it smart such that if the same JUnit test is used across multiple Test Case objects, do not re-execute the test again.
  • Allow for the insertion of JUnit parameters (right now only the class name is supported)
  • Make use of the Ant JUnit task code to provide better integration with Ant (right now the task will run stand alone)
  • Make use of custom class loaders so a user can specify a different classpath for use when running JUnit tests
Because of the list of deficiencies listed above (none of which will be addressed for this project given the limited amount of time) this ant task will not be much more than a proof of concept. However, it does show that the concept is sound and the code is simple enough to easily expand to support the above features and more.

Finally, I'd like to mention a happy realization I came to. This is the first project I've use JUnit on and followed the "write the test first" methodology. I have been somewhat annoyed at the fact that my test cases are so much longer, tedious, and hard to maintain than the code (my main class s only 172 LOC whereas the JUnit test framework to t est it is 560 LOC). But there is one really nice thing that comes from the JUnit tests and that is the feeling one gets when the test passes, particularly when it passes unexpectedly. It is almost like getting three cherries on a slot machine. It also gives me confidence that what I have written works well enough to move on to the next part.

Labels:

Wednesday, May 02, 2007

CSE 7312 Project Progress

It has been a bit longer than I anticipated between blog postings. There is a lot to report.

The first thing I did was put together a set of SysML Requirements diagrams which I used to better define what the ant task should do. It also helped further define the approach that I would take when I implemented the code.

Once I had a good grasp of the requirements and the over all approach I started coding. I am using the XML from Roberto's project as the input SysML file. I am using an Agile like approach wherein I write the test before I write the actual code. I am finding that the coding is much slower when I take this approach but it is hard to measure because I am finding a lot of errors that I probably would not have found until much later.

I am currently about 45% done with the coding and testing.

Tuesday, March 13, 2007

CSE 7312 Project: First Posting

This is the first posting for my Systems Engineering for Software Intensive Programs project. I suppose the best place to start is a description of my project so here goes.

My project dove tails with Robert's project quite nicely and describing my project without discussing his isn't possible. So I'll describe the over all project and then drill down into my part.

Objective:
Our objective is to build a tool on top of the Eclipse, Ant, and JUnit Test systems that allow one to generate SysML diagrams complete with test cases. The test cases are linked to JUnit tests where possible. An Ant task is provided that will execute the JUnit tests and update the SysML diagrams indicating the success or failure of the test. The ultimate intent is to have a SysML diagram that is automatically kept up to date with the results of the tests so one can tell with a look at the SysML diagrams progress towards realizing the requirements of the system. Not all requirements are testable with a unit test and in those cases the diagram may need to be manually updated.

Project Breakdown:
The scope of this project is beyond what one individual can accomplish in the time allotted. Therefore the project is split roughly in half. Robert will be responsible for the Eclipse plug-in and the graphical interface. I am responsible for the Ant task, executing the JUnit testing, figuring out the mappings between the diagrams and actual JUnit Tests and updating the XML used to generate the SysML diagrams so the progress can be represented. We will have to work together to define the XML representation we will use to communicate between the two components (and ultimately the store the SysML).

Scope:
Obviously a fully functional and realized system that covers the entire SysML spec, saves everything in XMI and is possible to fully test and update for every requirement automatically is well beyond what we can accomplish. However we can make a good first step. The scope of my project will be the following:
  • definition of XML that the diagram is stored in (co developed with Robert)
  • mechanism for tying a JUnit Test to a requirement through a Test Case
  • mechanism for executing those JUnit Tests from Ant
  • mechanism for collecting the results of the JUnit Tests
  • mechanism for updating the XML that the diagram is stored in with the results of the JUnit Tests
Blog:
In the coming weeks, the progress made on this project will be posted to this blog.

Labels:

Saturday, February 04, 2006

First Saturday

Woohoo! It was First Saturday again and I was there. For those who don't know, First Saturday is a monthly electronics flea market where you can get monitors for $20, really old lap tops, company surplus equipment and more. I didn't end up getting anything, but I don't really go to buy stuff. It is just fun to look around. Everytime I go there seems to be a theme of sorts. It isn't planned, but is seems that there is an unexpected item that shows up over and over again across the booths. This time around, the theme was dental hygene. I kid you not, but at this festival of electronic geekdom, there was a lot of toothbrushed and tooth paste for sale. I wonder if they are trying to tell us something.

Peace Like a River: A Review

Peace Like a River by Leif Enger is the latest book in my book club list. It is a fairly short book about a young boy with asthema, his miracle performing father, his older brother and younger sister. To say much more would give too much away.

This is one of the best books I've read in a long time. The writing is excellent and the story, though it moves along slowly, keeps the reader intersted. I highly recomend this book.

Friday, December 23, 2005

Vanity Progress

Slow. That one word sums up my progress on building the vanity. The problem is that it takes quite awhile join the wood together given that I don't have enough clamps and the glue takes awhile to set when it is cold out. So basically I was only able to assemble one 2"x2" board a day.

The final cabinet will be 21"x48"x36" with 2"x2" for the outer frame, six drawers and one door. So, this is what I thought I needed was 3 2"x2"x8' boards and one 2"x2"x6' board. So, after 4 days of mainly waiting I was ready to cut and I discovered an error as I tried to figure out how to cut the boards to have the least amount of wastage; I was 10" short. What I should have made was 4 2"x"2"x8' boards. So I joined up another pair of 1"x2"x6' boards and had to wait another day.

Before continuing, I'll explain the process I used to join the boards.

Joining Boards
Tools Needed:
  • Joiner
  • Hand plane
  • Lots of yellow glue
  • As many clamps as you can get a hold of
  • Hearing and eye protection
  1. Choose two boards that are strait, or that match each other's curve as closely as possible. Straighter is obviously better.
  2. Identify the least attractive side of each board. These are the sides that will be joined. Look for knots, defects, gouges, etc.
  3. Using the joiner, true up the side to be joined. This will help to insure that there is no gaps or noticeable seam where the boards come together. I usually run the board through until the blades hit over the whole board.
  4. Once both boards are square, apply the glue to both boards. Make sure the entire surface is covered.
  5. Place the two boards on top of each other with the glued surfaces together. Line the boards up as well as possible.
  6. Starting at one end, apply a clamp to the boards to squeeze the join together tightly. Move a little further down the board and apply another clamp. Keep applying clamps until you get to the end. Do your best to get the boards to line up before adding each clamp.
  7. Clean up as much of the glue as possible using a damp sponge. Carpenter's glue is water soluble and a little water won't hurt the wood. Let the glue set up as long as long as is needed. On a temperate day it should only take four hours or so. On a hot or cold day it can take all day. It is better to be certain the glue is set then to mess it up. I leave mine to set all day.
  8. Remove the clamps and use the hand plane to scrape off any remaining hardened glue and to level the boards. No matter how careful you are, there will be spots where one board is higher then the other. The hand plane will make quick work of these spots. I continue to plane until it takes shavings from both boards. Don't set the plan to be too aggressive or you can take more then you need.
  9. Finally, true up all four sides of the board in the joiner.
Using this process, I ended up with boards roughly 1 7/16"x 1 7/16" square, just short of the expected 1 1/2" x 1 1/2". All but one of the boards ended up being very very strait as well. Only the first one is a little curved.

Alright, I can start in earnest at last! I trued up one of the ends and made the first cut, a 32" board for one of the legs. Hmmm, that seems a little short. I went into the house to measure the vanity in the hall bath, and yes, 32" is right. But then I notice that the hall bath is really uncomfortably short. So I measured the kitchen cabinets and they were 36" tall. I did a Google search and vanities for sale were 36" as well. Grrrrr, another mistake, but I may have just enough wood.

Now I cut a board at 36" (much better). Now I'm a firm believer in templates and, since I'm also cheap, I quickly threw together a template to make sure all the legs are exactly the same length. Basically I attached a long board to the miter gage and clamped a block so that each board I cut is the same length. I set it up based on the first board I cut and cut the other three. I now have the four leg posts.

The next stage is to cut the rails for the sides of the cabinet. I want the outside dimension of the cabinet to be exactly 21" wide. Therefore I measured the exact dimensions of the legs and cut the rails so the final dimensions are exactly 21" (for the curious, that is 18 1/16" on the left and 18 1/8" on the right). Once again I find that I am short on joined wood, just two inches short at that. Oh well, I cut and joined up a couple more pieces for the last of the side rails and will have to wait until tomorrow to continue.

lessons Learned
  • Measure measure measure
  • Plan out how you will cut the boards
  • Write this stuff down! My problem is that I figured it all out but didn't write it down. If I had I probably would have had enough joined wood to start with.
  • Label everything (in pencil so you can sand it off later if need be)
  • Be careful of how you set the hand plane, it is easy to be too aggressive and take more wood then you intend.
Hopefully I'll have more post in the next posting in a couple of days.

Monday, December 19, 2005

The New Vanity Project Begins

Ever since I moved into this house (has it been 3 years already?) I have been remodeling one room to the next. I started in the master closet then moved into the master bathroom where the remodeling stalled.

There are a lot of reasons I stalled on the bathroom. The first is that I have a hard time making up my mind. I often spend more time planning and choosing between option then I do actually doing the work. Case in point: I've been trying to decide how I would finish the walls for over a year. Once I decided how I wanted to paint it, it took 2 hours to complete (pics will be posted to my Flickr account.

One major decision that has been holding me back somewhat is the vanity. I was not happy with any of the commercial vanity designs I found. They all looked to conventional, too ugly, or they would not go with the rest of the room. So I decided to design my own vanity.

First I modeled it in Carrara Studio, to get a feel for the construction, and the amount of materials involved. Next I built a 
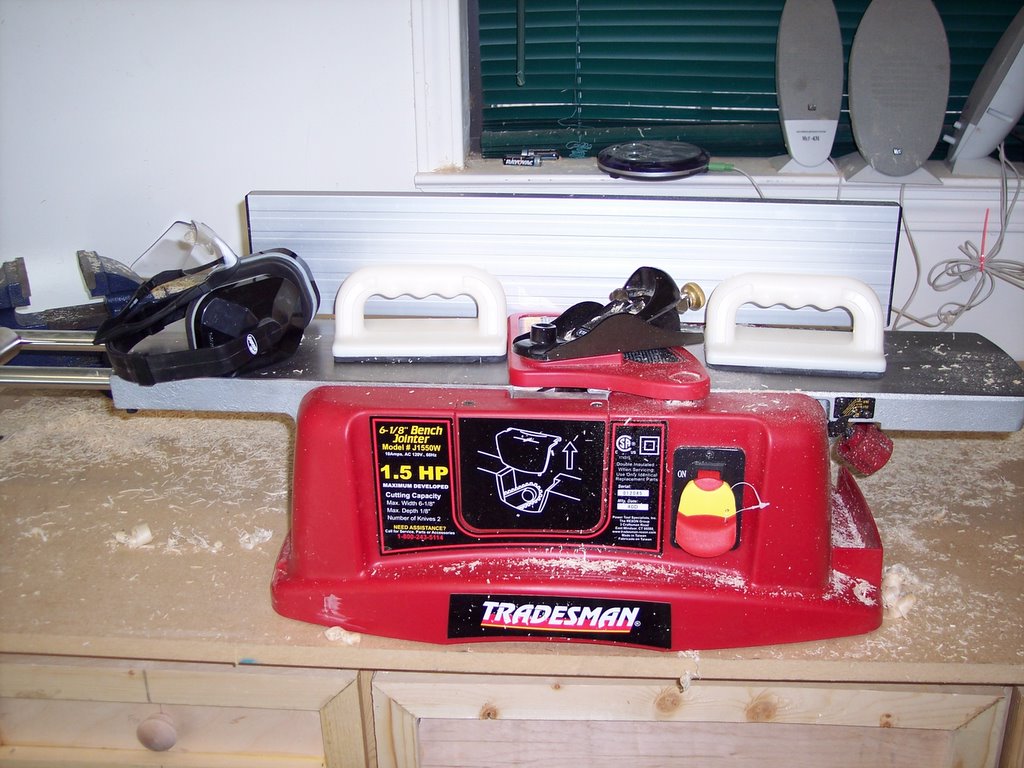
prototype using knotty pine and cheap plywood. I needed a new workbench anyway so this would be a way to kill two birds with one stone.

Then I stalled out again trying to decide what kind of top I wanted to put on it. In the end I decided on a speckled gray granite top with an under mounted sink. Now the construction is ready to start. I've purchased all the wood I think I need (if I did the calculations correctly) and the pocket screws I need.

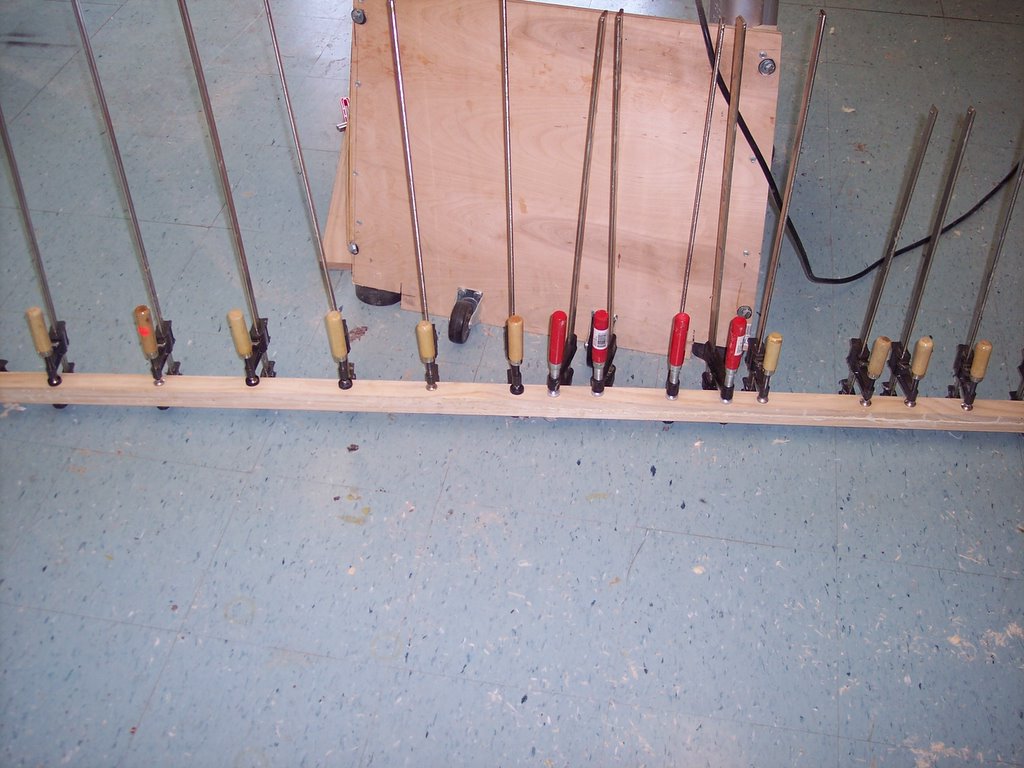
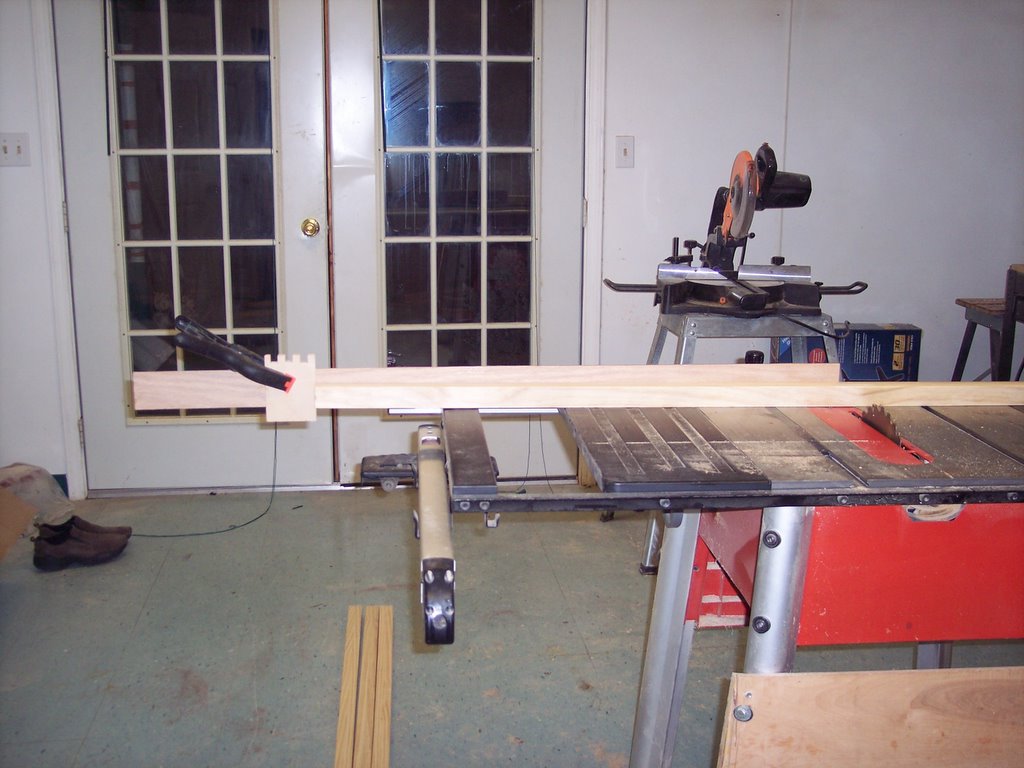
The design is basically to build a frame out of 2"x2" boards upon which the framing for the drawers and door hung. The frame is held together using glue and pocket screws. I know I could use a more involved and more traditional joint, such as a mortise and tendon, but pocket screws are strong enough and much easier to use. The drawers use a halfblind dove tail on the front and a rabbit on the back. I also use drawer slides on the drawers, even though doing so forces a smaller drawer.

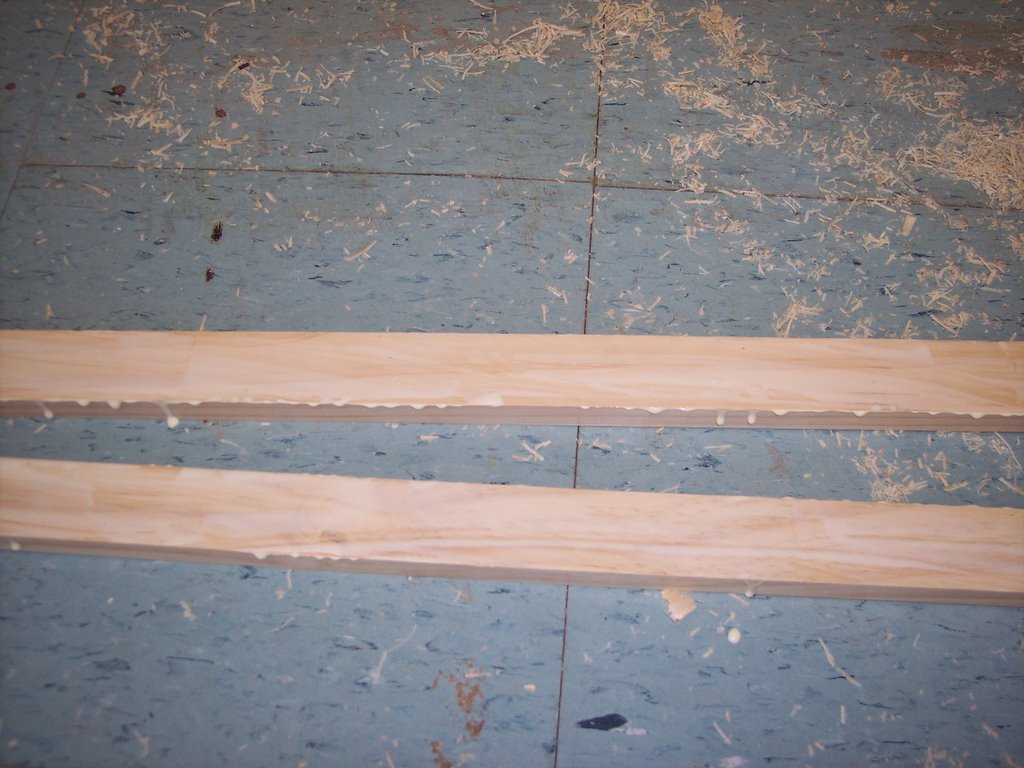
For the real vanity, I decided to use clear pine for the frame and the front, knotty pine for the internal framing, 1/4" birch plywood for the side panels, and 1/2 pine for the drawers (I'll use 1/2" birch for the front). I really like the contrast the two woods make on the prototype. MY choice of clear pine does have a problem. I've been all over and I can not get clear pine 2"x2" boards that are long enough. So I'm going to have to join two 1"x2" boards together for the main frame.

The vanity I'm building is 48"x21"x32" and my goal is to put this vanity together for under $600 (excluding the faucet). The list of materials thus far:

One granite vanity top: $300.00
One box 1 1/4" course thread pocket screws: $3.48
One box 1" course thread pocket screws: $3.48
Ten 1"x2"x8' clear pine: $29.50
Four 1"x2"x8' knotty pine: $6.32
Eight 1"x2"x6' clear pine: $18.24
Two 1/4"x4'x4' birch plywood: $26.58
Two 15/32"x4'x4' pine plywood: $27.98

I've already got wood glue and enough 1/2" birch plywood for the drawer fronts.

Total so far: $426

I will be posting me progress with pictures as the vanity building progresses.