Vanity Progress
Slow. That one word sums up my progress on building the vanity. The problem is that it takes quite awhile join the wood together given that I don't have enough clamps and the glue takes awhile to set when it is cold out. So basically I was only able to assemble one 2"x2" board a day.
The final cabinet will be 21"x48"x36" with 2"x2" for the outer frame, six drawers and one door. So, this is what I thought I needed was 3 2"x2"x8' boards and one 2"x2"x6' board. So, after 4 days of mainly waiting I was ready to cut and I discovered an error as I tried to figure out how to cut the boards to have the least amount of wastage; I was 10" short. What I should have made was 4 2"x"2"x8' boards. So I joined up another pair of 1"x2"x6' boards and had to wait another day.
Before continuing, I'll explain the process I used to join the boards.
Joining Boards
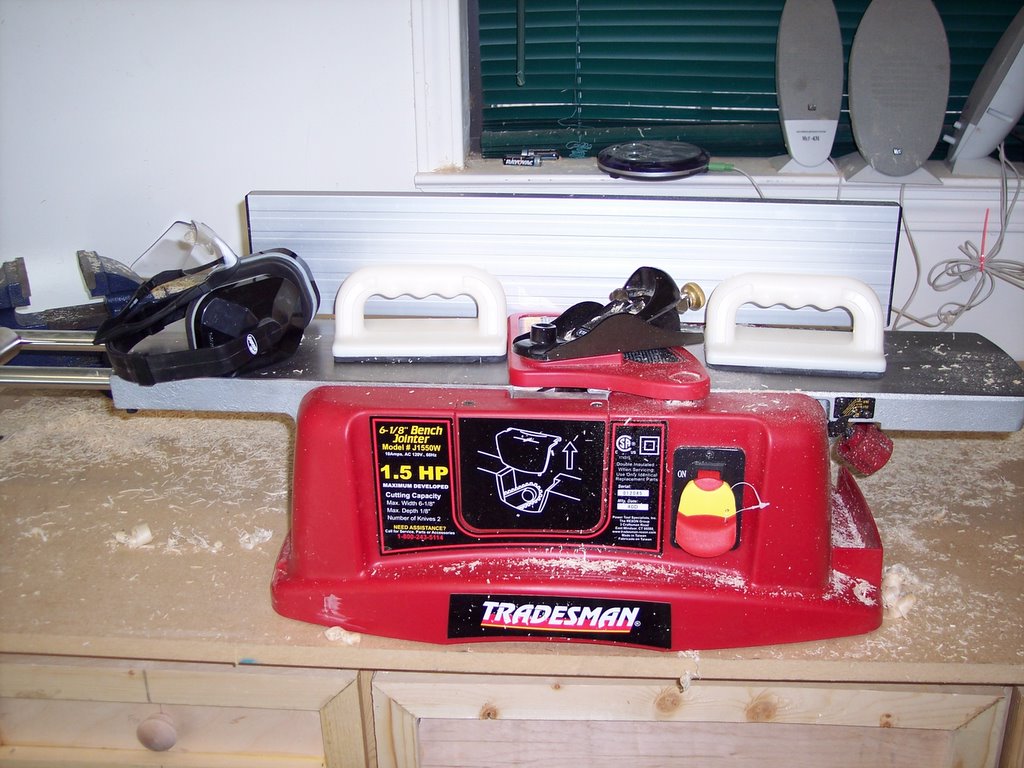 Tools Needed:
- Joiner
- Hand plane
- Lots of yellow glue
- As many clamps as you can get a hold of
- Hearing and eye protection
- Choose two boards that are strait, or that match each other's curve as closely as possible. Straighter is obviously better.
- Identify the least attractive side of each board. These are the sides that will be joined. Look for knots, defects, gouges, etc.
- Using the joiner, true up the side to be joined. This will help to insure that there is no gaps or noticeable seam where the boards come together. I usually run the board through until the blades hit over the whole board.
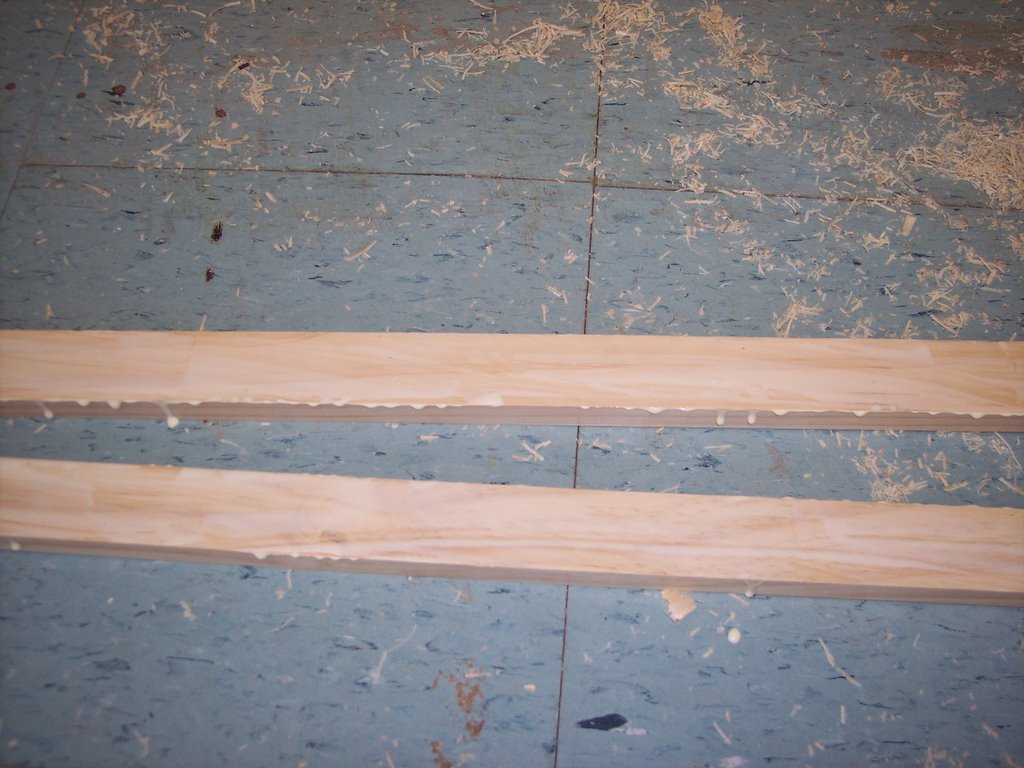
- Once both boards are square, apply the glue to both boards. Make sure the entire surface
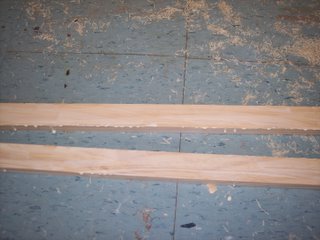 is covered.
 - Place the two boards on top of each other with the glued surfaces together. Line the boards up as well as possible.
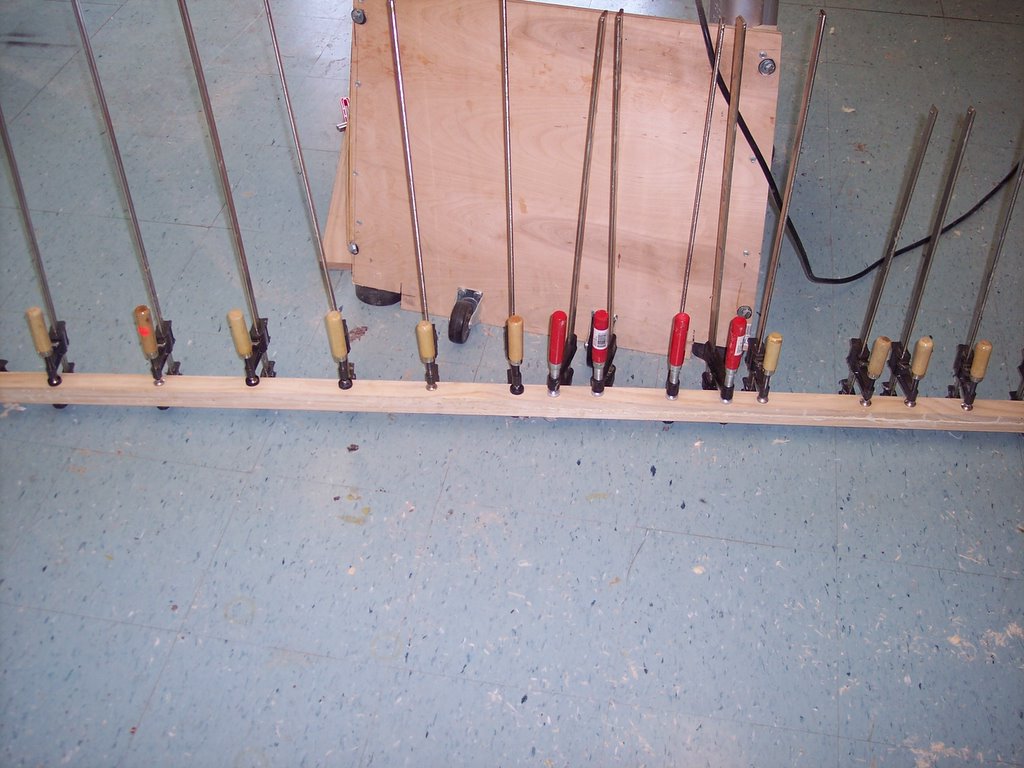
- Starting at one end, apply a clamp to the boards to squeeze the join together tightly. Move a little further down the board and apply another clamp. Keep applying clamps until you get to the end. Do your best to get the boards to line up before adding each clamp.
 Clean up as much of the glue as possible using a damp sponge. Carpenter's glue is water soluble and a little water won't hurt the wood. Let the glue set up as long as long as is needed. On a temperate day it should only take four hours or so. On a hot or cold day it can take all day. It is better to be certain the glue is set then to mess it up. I leave mine to set all day.
- Remove the clamps and use the hand plane to scrape off any remaining hardened glue and to level the boards. No matter how careful you are, there will be spots where one board is higher then the other. The hand plane will make quick work of these spots. I continue to plane until it takes shavings from both boards. Don't set the plan to be too aggressive or you can take more then you need.
- Finally, true up all four sides of the board in the joiner.
Alright, I can start in earnest at last! I trued up one of the ends and made the first cut, a 32" board for one of the legs. Hmmm, that seems a little short. I went into the house to measure the vanity in the hall bath, and yes, 32" is right. But then I notice that the hall bath is really uncomfortably short. So I measured the kitchen cabinets and they were 36" tall. I did a Google search and vanities for sale were 36" as well. Grrrrr, another mistake, but I may have just enough wood.
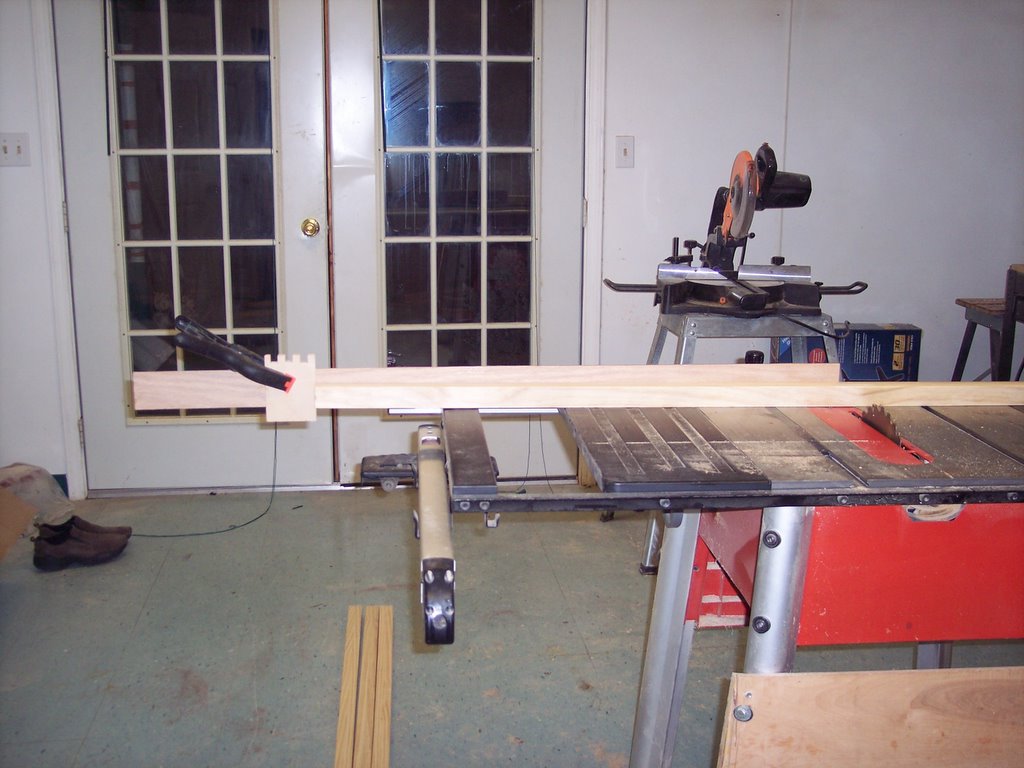 Now I cut a board at 36" (much better). Now I'm a firm believer in templates and, since I'm also cheap, I quickly threw together a template to make sure all the legs are exactly the same length. Basically I attached a long board to the miter gage and clamped a block so that each board I cut is the same length. I set it up based on the first board I cut and cut the other three. I now have the four leg posts.
The next stage is to cut the rails for the sides of the cabinet. I want the outside dimension of the cabinet to be exactly 21" wide. Therefore I measured the exact dimensions of the legs and cut the rails so the final dimensions are exactly 21" (for the curious, that is 18 1/16" on the left and 18 1/8" on the right). Once again I find that I am short on joined wood, just two inches short at that. Oh well, I cut and joined up a couple more pieces for the last of the side rails and will have to wait until tomorrow to continue.
lessons Learned
- Measure measure measure
- Plan out how you will cut the boards
- Write this stuff down! My problem is that I figured it all out but didn't write it down. If I had I probably would have had enough joined wood to start with.
- Label everything (in pencil so you can sand it off later if need be)
- Be careful of how you set the hand plane, it is easy to be too aggressive and take more wood then you intend.
posted by paperrhino @ Friday, December 23, 2005
0 comments
![]()

0 Comments:
Post a Comment
<< Home